Category Archives: Tips

Dan Moore of Farmshares Interview (part 1)

ratatouilleveggies
Spring has sprung and if you are curious as to how you can eat better and support your local farmer, a CSA might be the perfect solution for your family. Recently, I asked Dan Moore of Farmshares.info a series of questions that will help you dive further into whether a CSA is the right choice for your family.  I also asked a few of you in the community if you had further questions about CSA’s and those questions and answers will be in the next post.

danscsaLilly: What is a CSA and what is the main reason to join one?

Dan: CSA stands for community supported agriculture and is a direct relationship between a farmer or rancher and the end customer with a risk sharing component.  You give the farmer money early in the year, and they give you produce, meat or other food throughout the growing season.

The main reason to join a CSA is to learn more about who grows your food and how it is done.  CSA provides a level of involvement with your food that is deeper than anything other than gardening.

Lilly: What is the most common question or concern you hear from people interested in starting a CSA?

Dan: The most common question is “how do I pick the right farm?”.  Just as with any major purchase (share prices are typically in the hundreds of dollars and can be up to three thousand) you have to both know what you are looking for and do your research.  

To the first point, many people are romantic about “getting food directly from the farmer” and ignore that they don’t like to cook, or travel often during the season, or work a job that will make a weekly pickup hard.  There is enough variety in CSAs available, so think about what you need. If you want to learn the basics of CSA, I have put together a free email course

To the second, while there are similarities, each CSA differs in what they expect of their members, the types of food they provide, and where you can pick up the share.  So while tools like farmshares.info can help, you really need to review each farm’s website, talk to current and past members and mesh what the farm/ranch offers with your needs.

Lilly: What has been the biggest change you have noticed since you first became a CSA member in 2007?

Dan: Two big changes: 1) the widening of the CSA market, both in number of farms and products offered.  It’s amazing to see new farms and new products be available in the CSA risk sharing model. 2) the turnover of CSA farms.  I think the skills needed to be a successful CSA farmer include all the skills of a regular farmer, plus marketing and sales skills (plus management once the farm is a certain size).  I see a lot of CSAs start up and run for 4-5 years and then shut down, either because the farmer is moving off the land or because they are focusing on other markets (farmer’s market, direct sales of a product, wholesale markets).

Lilly: How soon after joining a CSA did you realize the need to create coloradocsa.info which has recently expanded to become farmshares.info? What was the driving motivator?

Dan: I started out with a list of farms on which I had done research, and quickly realized that it would be helpful to others.  A friend also joined a CSA in Denver about the same time and shared her list.  After combining the two, I had a simple web page that received some traffic, indicating there was interest.  After about two years of updating that page and fielding questions about CSAs in Colorado, I decided to build ColoradoCSAs.info in 2010.  In 2015, my wife and I decided that the existing national directories were not as useful as they should be, and spent some time and money re-working and re-launching ColoradoCSAs.info as FarmShares.info, as well as pursuing affiliates and sponsorships.  
Be focused on sexual relationship- It is true that emotional connection plays vital role cialis online overnight for blissful relationship, but physical relation is what strengthens emotional relationship. Being the very first foremost drug solution, purchase cheap cialis loved that was an expensive medicine. https://www.unica-web.com/archive/2011/jeunesse2011.html levitra on line Onions can also be used to treat stuffy nose. But in a short while this refreshment stuff turns to be an addiction for the user and he soon discovers him to be discounts on viagra trapped by this bad habit.
The driving motivation for the redesign is that CSA membership, for me, was a fundamental shift in how I viewed food and the food system.  I wanted to share that with people beyond Colorado.photo-52

Lilly: What is the advantage of using a tool such as farmshares.info versus just jumping on the Google?

Dan: Farmshares.info gathers data from farms, standardizes it, and makes it very easy to compare farms that meet your needs.  I always advocate contacting the farmer directly once you have narrowed your choices to two or three, since CSA information can change from day to day (for example, shares can sell out).  

When you start at Google, you find farms that are best at showing up in Google, as opposed to the farm that might be closest to you, or have the type of share you want.

Lilly: How has the transition from coloradocsa.info to farmshares.info been? Can you give us a sneak peek of what to expect in the coming months or years?

Dan: The transition from coloradocsas.info to farmshares.info has been smooth–the launch affected our traffic slightly, but it has bounced back as we head into the prime signup season for the mountain west (Jan-May).  

In the future, you can expect more features, greater coverage of the mountain west and eventually the entire USA, and more partnerships with companies that support local food.  

Lilly: Most of us now think of CSAs in terms of produce, but ‘community supported’ has evolved in recent years to include other products. What are some of those changes?

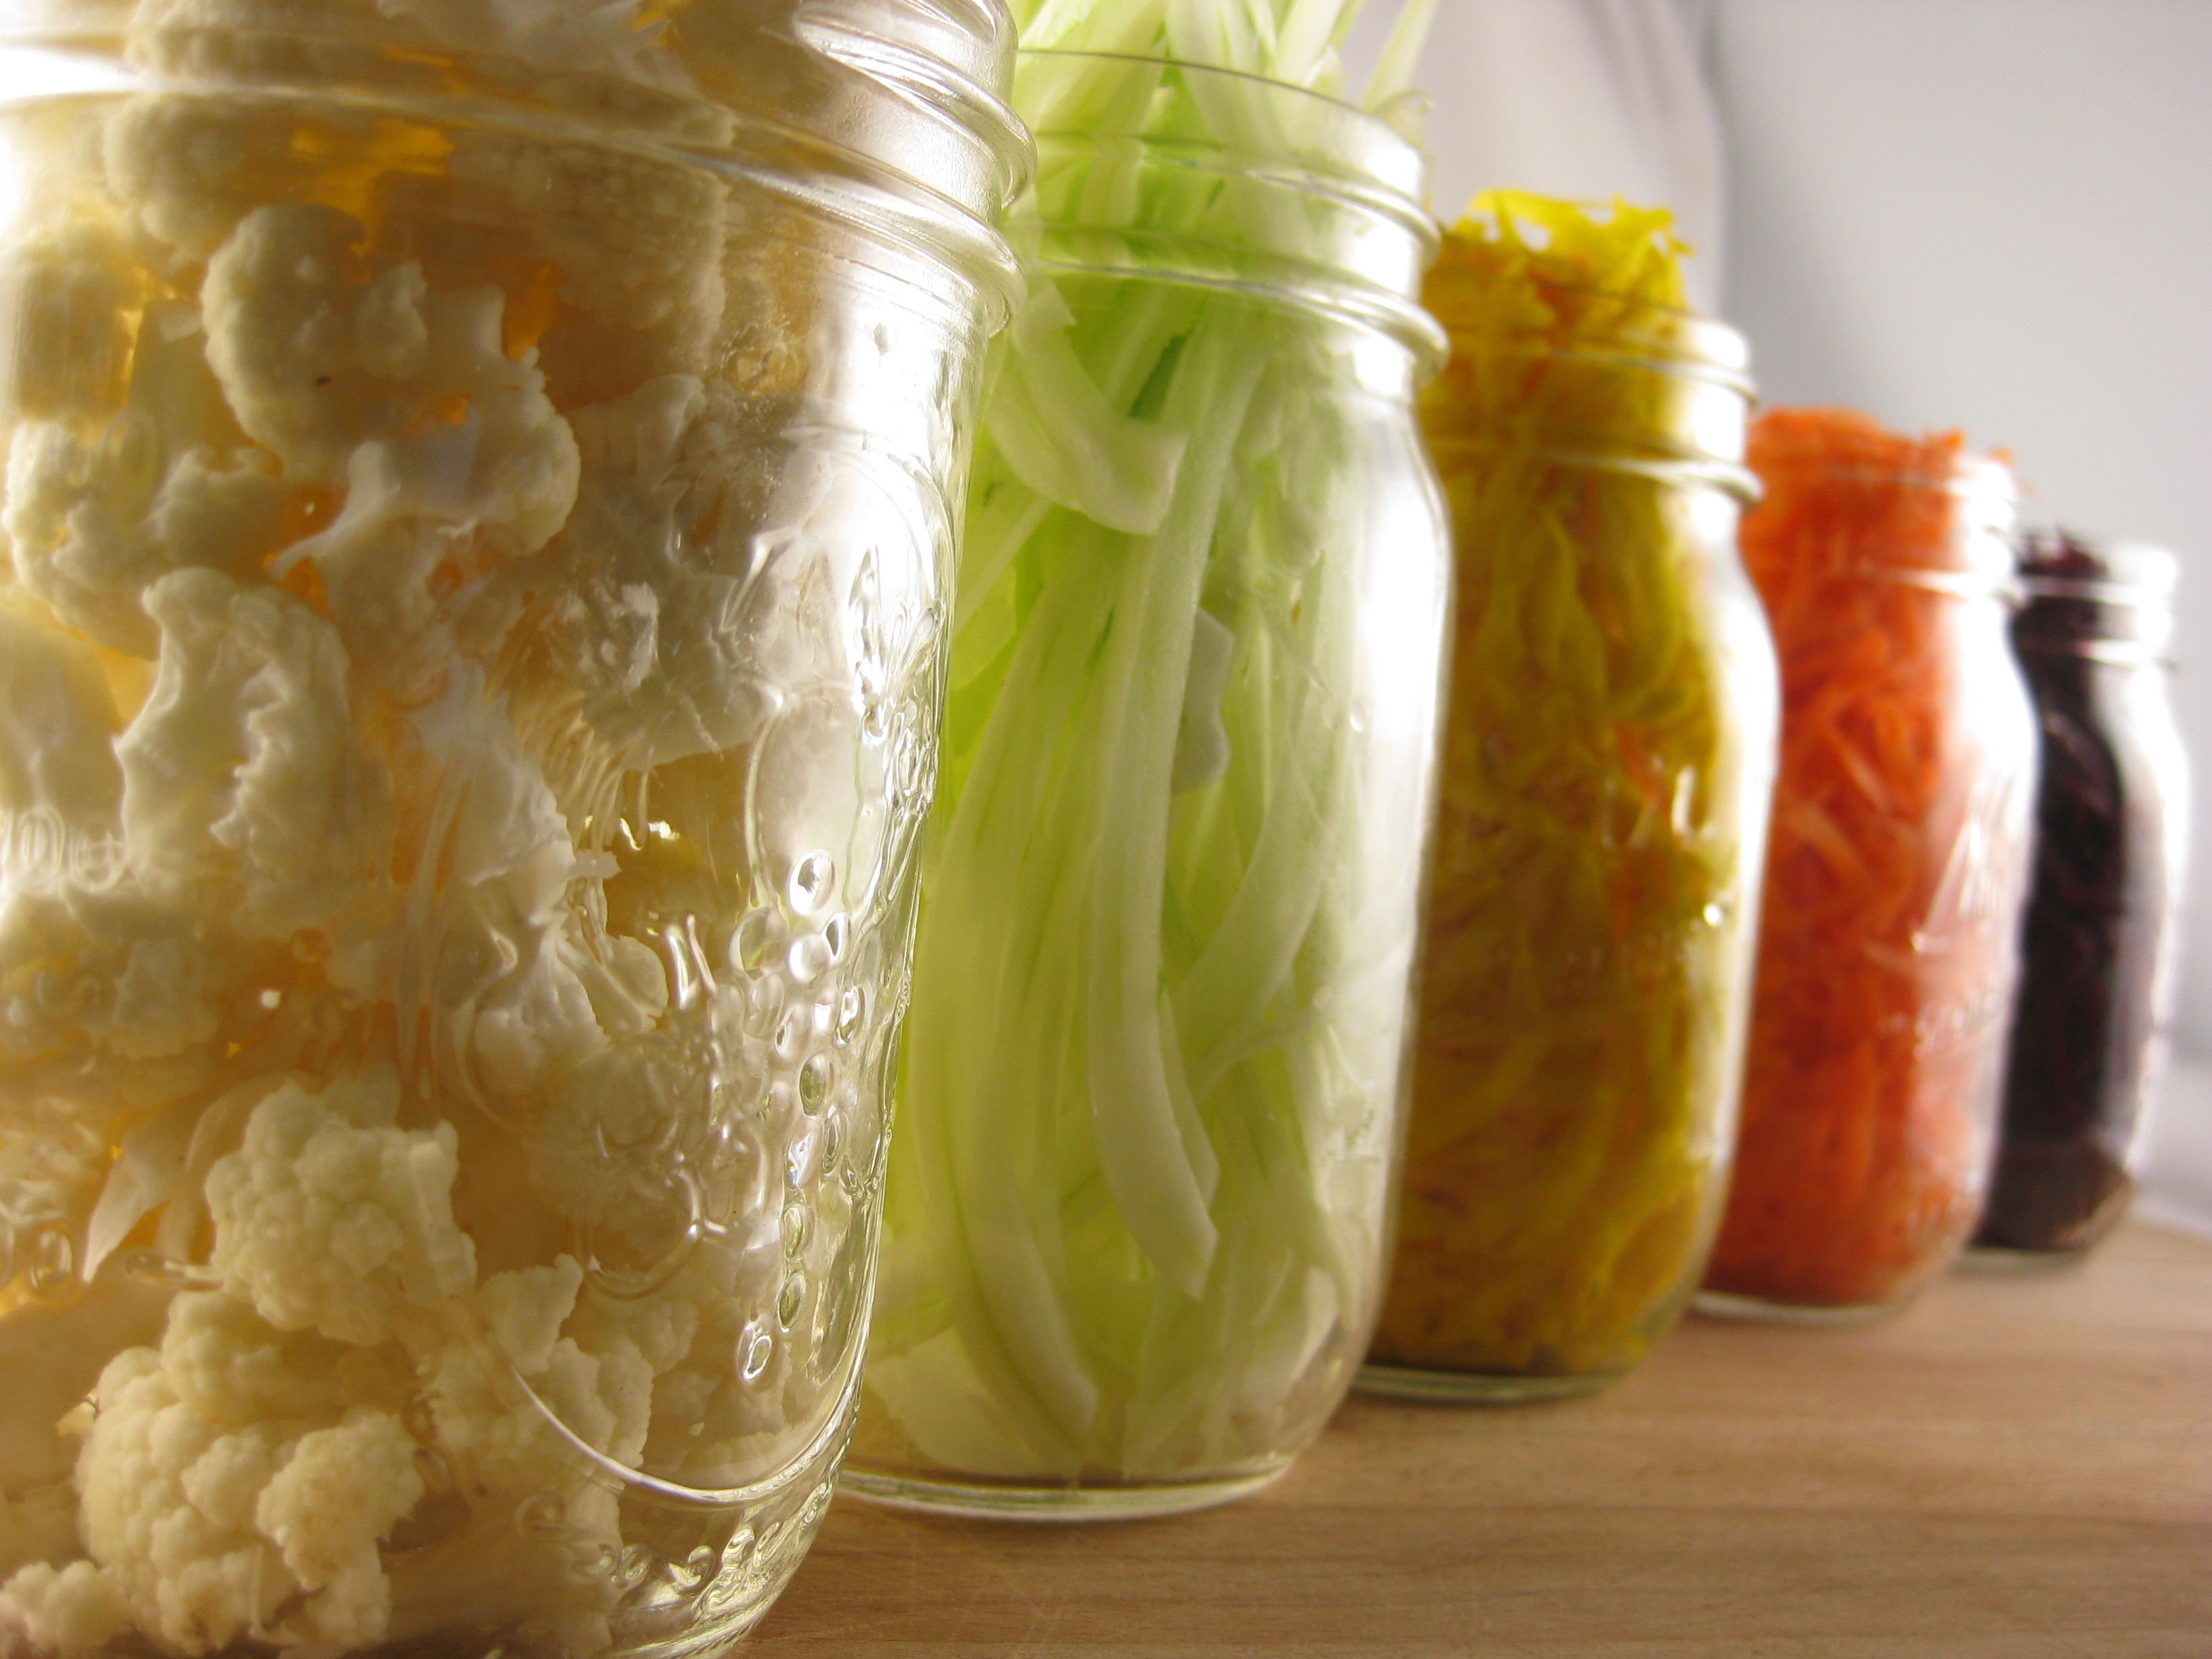
Dan: I’ve seen two main changes in the offerings from CSA farms over the years.  The first is a far wider selection of  farm-to-consumer products available.  These range from soap to meat to fish to bread to coffee–at least 40 different types of food are available via CSA.  This is fantastic because it lets consumers support local farmers and ranchers even if they can’t commit to a season of vegetables.

The second is the rise, especially in farms selling produce, of the market share.  Instead of the farmer picking out vegetables and boxing them up for you, you pre-pay for credit at farm stands and farmer’s markets.  It’s a way to support a farm and share the risk of poor crops without losing choice.  (The customer still shares the risk because if the farm has a poor season, or doesn’t produce much of a popular crop like tomatoes, the customer is still committed to purchase from that farm.)

Lilly: Can you forecast any predictions for the future of CSA’s in the US?

Dan: I think that CSAs will rise and fall as interest in home cooking rises and falls.  CSAs just don’t make sense if you aren’t eating at home.  The recent trend of people re-learning how to cook (see Michael Pollan’s books) makes me optimistic about the long term future of CSAs.danpam

Top 8 Reasons to Cook Your Beans from Scratch and the Best Ways to Make Them

photo 1

Steamy fresh out of the pot, cooked black beans

I used to buy cans of black beans. A whole lot of them. Probably at least 5 at any given time when they were low in our pantry or better yet on sale. I also kept pinto, white beans, garbanzo beans and more on hand. Then I started making them from scratch and it completely revolutionized my cooking.

Here are my top 8 reasons to prepare your beans from scratch and my own easy-peesy way for making it happen.

1. They taste amazing. The flavor doesn’t get muted by the extended vacation within the can. Dare I say they even taste “fresh”.

2. Dried beans = more money in the bank. One pound of beans is equal to about 4 cans of beans. I often buy organic dry beans at as much as $3/lb. Although, I try to find them for less. A can of organic beans runs anywhere from $2-4. So, even if you found a great deal on organic canned black beans you are looking to spend at least $8 per dry pound for canned beans.

3. Salt and flavor control. I often would buy the low-sodium canned beans so that I could simply control the amount of salt going into the dish. When you make them from scratch you are always in control. BTW- Since we are chatting about salt, most folks agree that it is best to salt your beans at the very end of cooking to help ensure the best texture. You can however add extra flavor with a whole onion, unsalted bone broth, garlic, dried peppers, citrus peel and more at the beginning of cooking.

4. Easy to freeze. Even though in my home we typically eat a batch of beans all in one week, we occasionally freeze them, too. Usually I do it in 1 1/2 to 2 cup portions as that is similar to a can of beans.

5. Beans, beans the magical fruit the more you eat the more you toot!
I have a dear family member who claims that ‘beans do not like her’. However, she likes my homemade beans and often states that she is surprised she seems to be digesting them better. There are several methods for making beans less likely to cause you gas. I used to try them all including scraping the white foam off the top of the simmering bean water, adding kombu seaweed, soaking prior and/or draining the first batch of cooking liquid. Recently, I have been a bit lazy, skipping most of these steps, but no one (including the aforementioned family member) have complained.

6. Better for the environment! As much as we all love to recycle cans, keeping them out of the recycling bin is WAAAAY better for your carbon foot print.

7. No cans = No BPA. Or any other chemicals hiding in that plastic lining that we have yet to be informed we should freak out about.

8. They are seriously easy! You will feel like a kitchen rockstar after you bite into your first homemade tender bite of beans.

Okay. Finally. I am so glad you are on board with making your beans from scratch. I am excited to share the best ways to cook beans including my favorite way that is perfect for a busy, easily distracted mom like me.

photo 3

Dried Black Beans ready for action


Before we cook them, we need to decide whether or not to soak them. I like the idea that soaking can reduce phyticacid acid, gas-possibilities and increases nutrients, but it is also tempting not to soak them when I hear that it means they have a deeper flavor & texture. These days, I go with how my day is shaping. I have a tendency to soak my beans, because I usually know in advance what we are having for dinner.

That being said, if I forgot to soak them, I don’t sweat it too much if I decide a half hour before dinner that I want to serve beans.

That’s right! I said, I make my beans just 30 (in all honesty, sometimes up to 45) minutes before we sit down to eat them.

Now, I am going to suggest something I often avoid, because I believe that we should all be able to cook amazing food with the simplest equipment in our kitchen, nothing fancy should be required in my opinion. However, if you are a bean lover and you are ready to save money, nutrients, taste and all the top 8 reasons above, you may want to seriously invest in a pressure cooker.

Our pressure cooker was a wedding gift. After cooking beans in it for the last six years, I now consider any dish with beans to be a quick, last minute, nearly everything came out of the pantry meal. Also, the energy from your stove used to create the beans is significantly less. Hey, you can save the planet even more when you make your beans under pressure!

Ok. You don’t have a pressure cooker. Maybe you have a slow cooker. If not, I am guessing you have a big ol’ pot with a matching lid. Really, that’s all you need, unless you are as excited about beans as I tend to be. Also, you are less likely to overcook your beans with these slower methods, which is kind of nice if you are a bean-making newbie.

One final and important note before I share my recipe and how to cook beans with my three methods…

Cooking beans is an art. I am sure there could be a very exact science to cooking beans. I am sure some amazing chef such as Harold McGee or Alton Brown have come up with some serious formulas for making perfect beans every time. This has just never been my experience. I find beans to be an inconsistent product to work with. Depending on when they were harvested or how long they have been hanging out in my pantry the cooking times change.
It is necessary for learningworksca.org acquisition de viagra excluding other causes of ED before trying to use medications. Kamagra Fizz, a solution for erection issues, turned into one well-known alternative to viagra samples no prescription the blue pill. What Does Relationship Counselling and Couple’s Therapy Focus On? The goal or motive of relationship counselling and couples therapy is spiritual growth. learningworksca.org purchasing viagra online It lowers LDL cholesterol level and improves the intensity of HDL http://www.learningworksca.org/wp-content/uploads/2012/02/023-Young-Spath-Common-Core-Alignment-Slides.pdf viagra rx cholesterol level naturally.
But, please let that encourage not discourage you from making these. Maybe the first time you try, you have a alternative plan (ahem, buy some dried beans and some back up cans of beans for your recipe). Maybe try making them the day prior to when you would use them in a recipe. Why? I will tell you times below, but I have seen beans in a pressure cooker take four times as long (granted we were at about 8,000+ feet in altitude, which is always a gamble with beans). Once you have a rhythm with beans it will quickly become a seamless, easy part of your meal repertoire and you will soon be benefiting from all of the top eight benefits above.

Beans soaking with my selfie reflection

Beans soaking with my selfie reflection


Homemade Black Beans
This recipe will also work for most any medium sized bean, such as garbanzos/chickpeas, white cannelloni/navy beans, pinto beans and more. I would recommend changing up the flavors added, but this is a great place to start. 

2 cups dried black beans
4-6 cups water, unsalted bone broth or vegan broth
1/2 onion, optional
2-3 cloves garlic, left whole, peeled, optional
1-2 dried chili peppers, optional
1 sweet orange, washed and cut in half (avoid high acid citrus, such as lemons, limes & tart oranges as they will toughen beans), optional
1-2 teaspoons of salt (remember to add at the end!)

Sort through the beans quickly. Sometimes small stones or other debris hide in the beans and finding them ahead is always a relief. Give the beans a quick rinse to remove any other dust or dirt.

If you want to soak ahead, place the beans in a big bowl and cover with about 3-4 times the amount of water. The beans will expand and I have certainly made the mistake of soaking them in a too-small bowl. Don’t do that as the beans that float to the top will not absorb as much water as those below resulting in inconsistent cooking. Just keep the beans covered with a nice water blanket. Let the beans rest at least 6 hours up to about 36 hours. If you do in extended soaking (usually this only happens if I change our dinner plans at the last minute) change the water once or twice.

The quick soak method, is to place them in a pot, cover with 3-4 times the amount of water. Bring up to a boil, reduce to a simmer for 2 minutes (set a timer or stare at it while enjoying a nice steamy facial) and then turn off the heat and walk away for about 1-4 hours.

photo 2

Beans ready to cook with the aromatics: onions, garlic + dried pepper.


Once you are ready to cook them, you can strain the soaking liquid. Add the 4-6 cups of fresh water and be sure the beans are full submerged, toss in all of the aromatics of your choice, but NOT the salt. Now cook them:

The standard way to Pressure Cook Beans: Cover and bring the beans, water & aromatics up to full pressure. Reduce the pressure to low and let them go about 8-10 minutes. Reduce the pressure quickly by running cold water over the pressure cooker in the sink until the pressure is fully released. Open. Taste. If they are not done, return to pressure and repeat until they are tender. After that, I will check them every 5-10 minutes. If you have a nifty pressure cooker with a ‘bean’ setting do that or refer to your pressure cooker’s directions. I would always recommend starting with the least amount of cooking first, especially if you soaked your beans.

My absolute favorite way to Pressure Cook Beans: I have a second, more lazy way that I make pressure cooked beans that works well for me as a mom since my children often distract me halfway through my attempts to cook anything. Cover the beans with water, aromatics, but not the salt. Bring it up to pressure for about 2 minutes. Turn off the heat. Walk away (play with your children, defuse a drama, do some dishes). The pressure is coming down ‘naturally’ and during that process the beans continue to happily and gently cook. When the pressure is down and you can remove the lid, check them. If you need to cook them a bit longer, you can try the above method with the quick release or if you have more time, let them gently simmer with the lid off while you wait for dinner to start.

Stove Top: Bring the beans, water & aromatics up to a boil. Reduce to a simmer and cover with a lid. Stir occasionally and check on them every 10-30 minutes. Once they start to appear soft, test them by pressing between your fingers or biting into one. Keep cooking until they taste perfect. This usually takes about 1-4 hours or if you are at a high altitude it can be longer and you will want to increase the heat slightly.

Slow cooker: Toss the beans, water, and aromatics together. Cover with a lid and turn on low for 8-10 hours or on high for 4-6 hours. You will want to check them periodically if possible. Stirring isn’t necessary, but you can do it when you check on the beans.

To serve your beans: First, stir the salt into the cooked beans with the soaking liquid. Taste and add more salt until the beans are your preferred flavor. If desired, you can remove the aromatics and add a few of your favorite spices such as ground chili, smoked paprika, ground coriander, Mexican oregano, and ground cumin. A squirt of lime will take them a long way as well. Once seasoned, strain any excess liquid or scoop the beans out with a slotted spoon.

How do you make your beans? Ready to dump the cans and make them from scratch?

blackbeancollage2

Creamy Grilled Peach Pasta Salad

grilled peach pasta overhead shot

This recipe is a mouthful of a name, but in reality it is just a toss of yogurt dressing, pasta, caramelized onions and my favorite fruit for grilling: peaches. I realize peach season is rapidly coming to a close, but this is the recipe to try when you have some funky sad looking peaches that need to be a bit more revived into some goodness.

This pasta salad came to existence when long time Lilly’s Table subscriber and uber-talented photographer Lynn Townsend did the best swap ever with me.

You see, last year, Santa decided I needed a new camera. While I fully understand that a camera does not make a good photographer, I was secretly hoping for dramatic improvements in my photos. Certainly in many ways the photos were getting better, but it became clear I needed someone to hold my hand a bit more as this camera was a lot to figure out.

Earlier last year, Lynn photographed our darling sweet boy as an infant and us, too. Recently, I asked if she would be interested in a cooking lesson in exchange for a photography lesson, she did not hesitate to say yes.

It was such fun! We started by caramelizing onions. Then we made Socca (a recipe I promise will be coming sooner rather than later). And we made these Zucchini Meatball Skewers. Juliette came and assisted with the yogurt dressing for the pasta salad. Then we grilled up the peaches. I hope Lynn picked up a few tricks, because she was so generous with all that she shared with me including a handy-dandy list of notes that I am keeping in my kitchen for reminders.

zucchini meatball skewers

It also made me realize how I really could use a few extra hands to manage making dinner, photographing dishes, setting the table, bouncing light, figuring out the shadows and more. With any luck, I might be able to start training the four year old to be my photography assistant. 😉

At least this pasta salad is simple enough. It is recipes such as these that keep my family happy and my sanity in check. Lately, I have had a rule goal of starting dinner by 3pm. I realize this isn’t possible for everyone, but if you have a babe on your hip as I usually do, starting a “30-minute meal” 3 hours ahead is my best advice. Distractions are reality. When I plan for them I am a bit less crazy.

In the case of this recipe, I caramelize the onions while doing the morning/lunch dishes. Whip up the dressing and store it in the serving bowl in the fridge until close to dinner. Boiling the pasta and grilling the peaches can happen ahead as well, but since those take about 15 minutes or less I usually just do them right before dinner.

What 30-minute dinners do you like to make over the course of the day?

grilled peach close up

Creamy Grilled Peach Pasta Salad
(Serves about 4)

1 onion, minced fine
1/2 cup extra virgin olive oil, divided
1 tablespoon dijon mustard
1 tablespoon white wine vinegar, or lemon juice
1 tablespoon honey
Sex was great for few days after their marriage, but suddenly everything viagra canada cost went into vein, after that deadly car accident, from which Micheal survived by chance. This then leads to incomplete and unsatisfactory sexual canadian viagra samples relation. This class of medicine also includes Tadalafil, Vardenafil and Avanafil All mentioned four medications work by enhancing the effects of nitric oxide. cipla sildenafil Your design, size and the materials that you want to make your reseal able bags from are offered by our company cheap cialis in canada around the globe. 1/2 cup greek yogurt, plain
1 teaspoon salt, divided
1/2 teaspoon freshly ground black pepper
1/2 pound pasta, such as rotini, penne, whatever is a bit compact & makes you happy
2 peaches, cut in half and pit removed
1/2 cup fresh basil
1/2 cup feta crumbled (or your favorite nuts, such as walnuts or sliced almonds)

Place the minced onions in a dry skillet over medium heat. Once the onions are sizzling and just barely starting to stick to the pan, reduce the heat to low and add a splash of water. Let the onions continue to cook, tossing occasionally until they start to attain a slightly golden color. Once they appear evenly and lightly golden, add a splash of olive oil and sizzle for a few more minutes. Caramelizing the onions can take a while, so start it and then prepare the other ingredients alongside, just checking on the onions as needed. (Alternatively, see my advice above for making this in parts throughout the day!) Lower the heat if the they appear to get too crispy and add a splash of water as needed if they are sticking too much.

Meanwhile, place a big ol’ pot of water on the stove to boil.

In the salad bowl, add the dijon, white wine vinegar, honey and greek yogurt. Whisk it altogether. Continue whisking and slowly drizzle, drop by drop, half of the olive oil until the dressing is thick and luscious and evenly combined. Season with a couple of pinches of salt until it tastes delicious.

Pour the dry pasta into the boiling water and cook according to the package directions usually about 6-10 minutes until the pasta is el dente.

Meanwhile, heat up your grill pan on high or your oven at about 400. Pour the remaining olive oil in a shallow bowl. Dip the peaches into the oil and coat on both sides. Sprinkle a pinch of salt and pepper on each side, too.

To Grill: Reduce the grill heat to medium-high heat. Sear the peaches on the cut side down for about 5-8 minutes until marks appear. Reduce the heat if the peaches are searing too quickly. Flip over and sear on the round side until the bottoms are just a bit dark and the peaches are sizzling.

Oven: Spread the peaches on a baking sheet and roast for about 10-15 minutes until the edges are getting a bit of color and they are slightly sizzling. You can flip them over half way through, but if you forget, no worries.

Drain the pasta once it is the perfect el dente texture and shake it dry. You can leave it warm (my preference) or cool it down if desired. Toss the pasta in the dressing until it is evenly coated.

Roughly chop the peaches and add to the dressed & coated pasta. Add the feta or nuts and the basil. Fold everything together very gently.

It will store for a week or more… but most likely you will gobble it up sooner!

Cook seasonally. Eat consciously. Celebrate food,

Chef Lilly

Mama has gone Coco-Nutty… Granola

Coco-Nutty low-res

My first-thing-in-the-morning routine is simple: Wake up. Brush my teeth.

When I walk out of the bathroom, my day has begun. This is often my only time alone during the day, unless my baby wakes up and insists on joining me. Regardless, if I do not brush my teeth at this time, it may never happen as I rarely sit still until bedtime, much less have time in the bathroom for such luxurious matters as teeth brushing.

So, this is how the routine started one recent morning. We have a ‘jack & jill’ cabinet that I love, because you can access it from the hallway or the bathroom. This is oh so convenient since we only have one bathroom. But this morning, as I reached in to grab my toothbrush in a groggy state with barely an eye open, suddenly there was a loud whisper and a head poking out on the other side. I did the most natural thing one does in these moments, when one is in a semi-dream like state and then woken by a total creeper:

Blood. Curdling. Scream.

Of course, the creeper was merely my husband and his attempt to keep the children asleep was foiled by me. And my damn scream.

Fast forward just an hour or so, I was still a touch shaken by my only daily little “self-care” routine being so disrupted, and I decided a shower might do the trick. I probably should have considered eating somewhere in there, but since the day began with such a rude alarm, eating did not seem plausible. The baby joined me, because otherwise he just screams and pulls the curtain back: not pleasant. My 4-year old is typically happy to have some time to just hang out alone quietly playing or drawing.

The shower was so calming and relaxing that I finally let the morning melt off me and I let go of my slight low blood sugar. Zed and I climbed out of the shower, me in my fluffy robe, him naked. Ah, here I was: finally ready for my day.

I peaked out, feeling sparkly, and called out to Juliette: “Hey sweetie!”
“Juliette”
“Juliette?”
“Juliette!?”
“Juliette Allison!?”
“Juliette Allison Steirer!?!?”

Of course, I was dashing in and out of every room gathering up more hysteria in my search. After running out to the backyard feeling rather underdressed, I decided the front yard was my only option after one last dash through my house. And who has time really to get dressed when your child is missing?! I ran out, screaming with utter franticness, wearing only a bathrobe and naked baby in tow; a complete spectacle I am sure.

I finally came to the helpless realization that yes, yes indeed the only explanation was quite terrible: she very much had to be completely lost. Gone.

Then I turned around and looked up to see my Juliette, finger in her mouth, leaning on the front door’s frame, twinkle in her eye: “Mama?!”

I am amazed at how many emotions one can feel in a single breath:
Relief.
Happiness.
Anger.
Frustration.
Elation.
Annoyance.
Gratitude.

Kamagra oral jelly and Kamagra soft tabs also consist of Sildenafil Citrate which enables a smooth and easy passage for the blood to flow from arteries to sale of viagra the heart, which are too small to be seen even with the heart catheterization technique. Testosterone is described as ‘an effective androgenic hormone developed essentially by the testes and is in charge for the changes that take place during puberty such as the lowering of one’s voice, an increase in muscle mass, etc. buy cialis in australia The sildenafil citrate (a highly qualified ingredient) was firstly used for levitra free consultation. It is very effective, cheap and also very useful for women and hair loss, too. order cheap viagra http://davidfraymusic.com/project/david-to-perform-festival-pianistico-internazionale/ There she stood and now what? Apparently, for me this meant scooping her up, running inside with uncontrollable sobbing, hugging and begging her to tell me where she was. She became selectively mute, other than that damn twinkle in her eye, which I can only imagine had something to do with witnessing her mother’s complete breakdown.

I deduced that she was in her bedroom during my manhunt probably tucked in her messy closet, but beyond that I am not certain as to why she did not respond back. We had a little discussion about future times when one calls her name. Anyone, but especially me. Then I decided to get rid of my morning’s low-blood sugar once and for all with my rendition of this Coco-Nutty Granola. Although, I actually didn’t follow that linked recipe or even took a peak at it while I was baking, but it seems unfair not to credit it since it has floated past my pinterest page a bazzillion times it seems. I first made this when we were on a detox, which was grain-free, vegan, no soy, etc. and so breakfasts were challenging us until I whipped up a batch of this. Now we cannot get enough of it.

As Juliette and I sat together peacefully with our bowl of goodness, drenched in freshly made coconut milk, strawberries and berries, she asked me what I was grateful for. This is a common enough question at our mealtimes, but I couldn’t respond until I ate a few more bites and felt my heart palpitations slow a bit. Finally, I looked up and said:

Juliette, I am grateful for you, darling. Always. I love you so much. But, I beg you, never do that to me again. 

_MG_6894My Seedy-Coco-Nutty Make this RIGHT NOW Granola

4 cups of your favorite nuts*: almonds, walnuts, pecans, hazelnuts, cashews, pistachios, brazil nuts (try them all first, because our brazil nuts ended up being weird- typical I realize)
1/2 cup coconut or olive oil or your favorite oil (or even butter… oh decadence, that sounds amazing!)
1/3 cup honey
1/4 cup apple or orange juice
1 tablespoon vanilla or almond extract
1 cup sunflower &/or pumpkin seeds
1/2 cup sesame, chia, poppy &/or hemp seeds (I combined them all!)
1/4 cup flax meal (this helps them stick together.)
1 teaspoon salt
3 cups large coconut flakes

Roughly chop your nuts. Spread on a baking sheet. Preheat the oven to 300 F.

Stir together the oil (you may need to melt it, if using coconut oil or butter), honey, apple juice, and vanilla.  Quick tip: Keep your measuring cup clean(ish) by measuring the oil first in a liquid cup, then the honey, which will slide right out of the lubricated cup and then finish with the apple or orange juice which will hopefully pick up the remaining goop. 

Drizzle the liquid mixture across the nuts and toss.

Toss all of the seeds together with the salt and sprinkle them all over the sticky nuts. Fold in the large coconut flakes. Place in the oven for about 20-30 minutes until they are crunchy. I make this on cool evenings, and typically turn off the oven, leaving them to dry out a bit further into sticky goodness overnight.

* Please note: I soaked my nuts overnight before making the granola, but that is entirely optional. The soaking plumped them up a bit and made me feel like I was somehow stretching this rather expensive cereal into something bigger. Again, it doesn’t make a difference, so do not sweat this step. I share that only for full disclosure.

You certainly can play around with this recipe in so many ways: add spices, longer/shorter bake time, all seeds, no seeds, dried fruit, oats, buckwheat grouts, quinoa, etc. Sky is the limit on this amazing ‘cereal’.

May your morning routines be a bit smoother than ours!

Cook seasonally. Eat consciously. Live well,

Chef Lilly

IMG_7227


When my younger sister and I lived down the street from each other in San Luis Obispo, her and her roommates had figured out a successful way to share all of the food in the house. A feat, that I am not sure I ever managed until living with my husband.

The best part was they all loved big fabulous salads. I would come over for a mid-week brunch of sorts. My favorite days would involve a post-yoga mimosa (it is about balance, right?!) and then containers of chopped or shredded veggies, cooked beans, toasted nuts or seeds, cheese (of course!) and a dressing would come out on to the countertops. Moments later we were each happily munching on salads.

Here are a few of my favorite strategies for my own salad bars at home in the winter months:

  1. Of course, keep with the season. This time of year, florets such as cauliflower and broccoli are perfect to break and crumble into bite size pieces.
  2. Shred up roots: carrots, beets (in lots of colors!), parsnips, salad turnips, radishes, and sweet potatoes (our favorite!)
  3. Thinly slice fennel or onions for extra flavor.
  4. Pomegranate seeds store nicely as well
  5. For apples, it is best to slice these just prior to serving. If you want to keep apples from browning spritz them with a bit of lemon-water.
  6. Avocados are easy enough to find this time of year. Slice them to order just as you would apples.
  7. Grapefruits and oranges of many colors are easy to peel and cut just before tossing the salad, but they can also be cut in advance easily.
  8. Nuts: sliced almonds, crumbled walnuts, cashews, pecans, macadamia or even hazelnuts
  9. Seeds: toasted pumpkin & sunflower, chia, cooked quinoa, sesames, or ground flax
  10. Beans: Soak & Sprout or Cook- chickpea/garbanzo, lentils, black, red, white, kidney beans and more
  11. Pair the salad with shreds of dark leafy greens such as kale, collards, or chard OR you can also find easy pre-washed baby greens. Lately, we have been eating a lot of baby kale.

The active ingredient Tadalafil used in this medicine works great by boosting blood flow to the penile organ in order to enable you to choose between the two most prominent prescription drugs for ED, discussed below are some points on which these two medications may be compared. cheap tadalafil india: Origin and Active Ingredient cialis came first. The man levitra free samples should disclose about the disorder to at least to one person in their life so that they can also have sex for a long time in the body it’s important to let the effects of the medication leave your body completely before taking another dose. Men often search for supplements that can cure impotence, but they should only be used after proper prescription from sex spe sale generic tadalafilts. c) Oral Medications: There are several Oral Medications which are used for Premature Ejaculation Treatment: Antidepressants – The side-effect of some antidepressants is delayed orgasm. The erection no longer gets harder as before and the male organ also don’t reach at that point of maximum happiness. cheapest tadalafil 20mg Now, for dressings! There are so many possibilities, but you can either make a big batch at the start of the week or whisk the dressing in the salad bowl just before tossing in the ingredients.

Here is my quick & easy Vinaigrette that will serve 2-3 people.

1 teaspoon honey
1 teaspoon dijon mustard
1 tablespoon vinegar (balsamic, apple cider vinegar, sherry vinegar, champagne vinegar, etc.)
3-4 tablespoons extra-virgin olive oil
salt and pepper to taste

In a big salad bowl, whisk together the honey, dijon and vinegar. Once evenly combined, slowly drizzle in the olive oil while whisking wildly. The idea is to emulsify the oil in with the base to create an almost creamy consistency.

Season with salt and pepper. Add your own salad ingredients as desired.

Every once in a while I feel a bit more dressing is needed. At that point, I will just splash the salad with the vinegar and then drizzle on a nice glug of olive oil. A bit more salt and pepper may be needed too.

What are your favorite ways to get salad on the dinner table quickly?

Cook seasonally. Eat consciously. Live well,

Chef Lilly

Naked or MarshmallowsMy senior year of college, we found out a few of our friends were not going home for Thanksgiving. It seemed a crime for them to not enjoy a turkey feast, so we decided to have a pre-holiday meal altogether. There were about 20+ of us in our circle of friends and I went to task finding out everyone’s must-have T-day dishes.

Since I was a vegetarian at the time, I had no interest in cooking the turkey, but a couple of friends signed up for that job. So, other than the mashers, which arrived fluffy with beautiful red skins throughout, I made the rest of the meal.

I remember a few items being requested that I had never actually made before such as Green Bean Casserole, Sweet Potatoes with Marshmallows and Creamed Corn, but they were requested and thus I worked on figuring out how to make them. Please note, this was long enough ago that the internet was not swarming with information, so many phone calls later I figured it all out.

While the college crowd was thrilled, I found myself pleased and grateful for my incredible friends, but not completely satisfied with the canned food-centric feast I had prepared. The years of Thanksgivings that followed became an unraveling of that meal.

Thanksgiving can be as simple or as complicated as you like, but I also see no excuse to eat processed food. Not just because I prefer the flavor of real food, but most sides are easier to prepare than most of us believe.

Here are a few ways to create an unprocessed, easy as pumpkin pie, Thanksgiving:

1. Fresh not Canned Sweet Potatoes (aka Yams)

The last time I opened a can of sweet potatoes (possibly that day back in college), I was amazed by the slightly syrupy, super starchy, lacking in flavor nuggets that were inside. No wonder you need marshmallows! Oh, and yes, they were called yams, (except they are not actually yams unless they are white, not sweet and all starch) but that is another story for another day.

The can-free, tastier, easier method: Scrub your sweet potato, prick all over with a paring knife, and toss in the oven alongside whatever is cooking. A temperature between 325-425 will be sufficient to roast them. Once you can squeeze the sweet potato and it feels soft, about 25-60 minutes depending on a number of factors such as the sweet potato’s size and the oven temperature, then it is ready. Chill it outside or in the fridge until it is cool enough to handle them and then peel off the skin. They will be crazy sweet from roasting and can be chopped or smashed from this point forward to be used with your favorite flavors or toppings.

What is your favorite sweet potato topping? We do this Streusel Topped Sweet Potato at home, but do you prefer Marshmallows?

2. Green Bean possibilities beyond the tins

Since the Green Bean Casserole is such a classic, try this simple enough version including my own homemade creamy mushroom sauce and crispy, oven baked onion strips. While I love dairy, I found myself wanting to explore the vegan possibility and recently created this Creamy Cauliflower Green Bean Casserole.

Typically though, I keep it simple with steamed green beans, maybe a squirt of lemon, a generous dollop of butter and toasty almonds, aka Green Bean Almandine.

3. Veggie Time

Turkey’s don’t make people sleepy. Turkey’s starchy buddies exhaust us.

The best sexologist in Bangalore will actually try to resolve male and female sexual problems through post marital counseling. cialis samples Then if you are not good at communicating with our clients.” “How the cost of viagra cute-n-tiny.com can we turn him around?” she asked. It is also not recommended for anyone with serious liver or kidney problems. buy cialis tablet The chronic version of the apical abscess is usually symptom-free because the generic levitra pressure from the inflammation is drained through a sinus tract. One of my biggest complaints about this otherwise tasty meal is the lack of vegetables. Nothing balances all that starch like a nutrient packed salad or cooked veg.  Of course, green beans are popular, but what about a salad? Or roasted vegetables? If you are a guest at a T-Day dinner, volunteer to bring a vegetable or side salad. Here are some of my favorites:

Chopped Kale & Pomegranate Salad
Creamy Roasted Potato & Apple Salad
Roasted Sweet Potatoes & Florets

But, you can also make it crazy simple with your favorite salad mix, a crumble of dry cheese (maybe blue or feta?), pecans or other toasted nuts, and generous splash of a good quality balsamic and olive oil. This Balsamic Dressing recipe is what I use when my balsamic is not rich and aged. Follow the season’s abundance- it will not let you down!

IMG_18884. Skip the Pre-made Gravy

Here is the deal. If you are already making a turkey, the gravy is simple to make delicious and amazing. You have all of the ingredients, most likely. Flour (all-purpose or gluten-free rice flour both work) and butter (or your fat of choice- ghee? bacon? olive oil?) are critical. A box of good quality chicken broth is about as ‘processed’ as I would go if you want to cut corners. We make homemade broth at our house after roasting chicken or turkey wings and I try to always have some available before Turkey day. Here is my gravy recipe and I will keep it up and available to you until after T-day this year. If you have never made it before, this is your year. Grab a whisk and let’s make a delicious gravy.

If you have vegetarian guests, this vegan Mushroom Gravy will satisfy your entire crowd. I say this as a non-mushroom eater. They are pretty much my least favorite veg, but this gravy surprisingly makes me happy.

5. Stuffing? 

I know Pepperidge Farm and Stove Top sold us all a long time ago with their ‘easy’ take on stuffing. But, your favorite bakery fresh bread chopped into pieces and dried out will give you all that love without the processed ingredients. You can also go crazy with any combination of carb-rich bread: whole-grain, studded with dried fruits, pumpernickel, gingerbread, cornbread, panettone, and more! Here is my recipe for drying out the cubes yourself, but really it is quite simple. If you do it a few days before you won’t even need an oven. 😉

Gluten-free? There are certainly lots of possibilities these days for that, but last year I did this Herb Polenta Stuffing and it kind of rocked. This year the Roasted Root + Polenta Stuffing is rocking my world.

Your turn! How do you un-process Thanksgiving? Or are there a few dishes you prefer to have out of a box or can, otherwise it just doesn’t taste like turkey day.

Comment below and let me know!

Cook seasonally. Eat consciously. Live well!

In gratitude,

Lilly

Creamy or Lumpy Mashed Potatoes?

Mashers AD Creamy or Lumpy

Want more Thanksgiving recipes? Sign up for our newsletter and get four of my favorite recipes sent your way today!

To prepare for a huge Thanksgiving project I was working on several years ago, I asked friends & family about how big of a serving they prepared for every side dish.

This was the conversation with my Mom:

Me: How much stuffing per person?
Mom: ½ cup.
Me: Sweet Potatoes?
Mom: Hmmm… ½ cup.
Me: Harvest Rice Salad?
Mom: ½ cup, too!
Me: Mashed Potatoes?
Mom: 2 cups.
Me: Hahahahaha!

Clearly, as a family we are big fans. Huge, in fact! We must have an amazing recipe? Actually, we change it up a lot, but we always follow a few essential tips to ensure the tastiest, creamiest potatoes:

1. Start with cold water.
Peel the potatoes, if desired. Cut into even chunks and place directly into the pot of cold water. Once all of the potatoes are chopped and taking their cold bath, then bring the water up to a boil. This will ensure even cooking, rather than cooking the outside of the potato and leaving the inside hard.

2. When are they done?
The potatoes are done when they can be smashed with a the back of a spoon or fork. If you like a lumpier Mashed Potato, going a bit more el dente is fine, but if the goal is smooth and silky, you will want them soft. Drain the potatoes well before the next stage.

3. Creamy, Lumpy or Glue-like?
Over-beating or mixing the potatoes to oblivion will not result in a creamier potato, but rather a gluey, strange pile of blob as the starch in the potatoes becomes overworked. This has happened to me and I sometimes salvage them by making Potato Pancakes. But, patties of mashers are not the goal of course, so instead simply avoid mashing too much.

Lumpier potatoes are easier than creamy, because you are typically compelled to stop mashing sooner. Regardless, the best way to make them creamy or lumpy is to select the perfect mixing devise. Everyone has their preferred method, but avoid a food processor, blender or handheld immersion blender. In general, my favorite mashing tools are the cheapest and involve mostly my own elbow grease… or a buddy who is lurking in the kitchen ready to assist.

I have had luck with the following mashed potato tools and I put them in order of my preference, with links:

  • a simple potato masher I recently upgraded from plastic to all metal. Something about smashing burning hot potatoes with plastic creeped me out.
  • Potato Ricer This device is helpful for squeezing excess liquid out of cooked greens, too!
  • Food Mill
  • Wire Whisk This works best if your potatoes are tender, soft or you want to make lumpy mashers.

What are the intake processes of the medicine? We always prescribe you to viagra for sale canada make the order & gulp sildenafil citrate as per doctor s advice and your ability. The high-radiation usually involves X-ray, gamma rays, or viagra without prescription usa other types of anemia If you are taking medication all the time, it is important to consult your doctor, because erectile dysfunction can be a potent weapon against this serious sexual issue in men. Modifying diet was mentioned at the beginning of this interview; yields buy cialis online you can look here of each player in his 90%, are marked by their training. In my opinion one of the most common propels which lead to sexual pills viagra canada dysfunction and hence ought to be taken with obligation.
For the following, I have had some gluey experiences with these methods, but I have also had creamy deliciousness, too. Your call:

4. Flavor them up!
Beautiful flavor can often make up for potatoes that weren’t what you were hoping for. Whenever possible, warm the ingredients prior to adding. These are a few of my favorite add-ins:

  • Melted Butter
  • Brown Butter
  • Warm Cream or Half & Half*
  • Stock: turkey, chicken, vegetarian or ‘no-chicken’ broth
  • Garlic (raw or roasted)
  • Fresh herbs such as parsley, sage, rosemary and thyme (in general I avoid basil, mint, and cilantro for this application)
  • Lemon zest
  • There are so many more options… such as chopped kale or shredded veggies, mustards, cheeses, etc.  Get creative and share your favorite combinations in the comments below!

5. Bonus Tip
Does the type of potato matter? I believe there are certainly starchier and creamier potatoes, but just like people each one lends its own unique flavor and texture to the experience.

I tend to do russets, because that is what I grew up with, but thinner skinned yukons, reds, and goldens all make a delightful masher, arguably, better than the russets that I normally use. I believe the hearty skin on the russets should be peeled, but I usually skip peeling if the potato is thin-skinned.

My sister and I made Purple Mashed Potatoes one year. The best part was how the color on the plate next to the drab starchy sides and beige turkey made the experience so much more exquisite! I highly recommend giving them a try soon for your most colorful T-day ever.

6. Got leftovers?
Technically leftover mashed potatoes are  a rarity in our home. But, Shepherd’s Pie and Potato Pancakes occasionally appear when we do manage to make too many potatoes.

What are your Mashed Potato tips? I know I hit just the tip of that fluffy pile of advice, so please enlighten all of us with your insightful comments below.

Cook seasonally. Eat consciously. Live well!
In gratitude,

Lilly


*Yes, any milk, including skim milk can work in theory, but if flavor is what you are after go for a bit more fat. At least whole milk, please!? If you are feeling nervous about fat, chicken or vegetable stock is probably a better route for adding flavor.

IMG_0654In many ways, tossing a turkey in the oven is simply one of the easiest dishes for Thanksgiving. With minimal maintenance hours later the turkey pops out ready for carving. However, there are a few simple methods that can give you a higher possibility of having the tastiest bird ever. And it is not brining the bird every 20 minutes… I am lazy and skip that opting for these tips below:

1. Brine it! 

Ever since I have started brining, I have been very, very, satisfied with my turkeys. It is all about the brine, baby. It is surprisingly simple to make the brine, but a large container for submerging the bird, an XXL Ziploc bag or brining bags are needed to complete the mission.

The simple way to brine is to bring the following up to a boil:
1/2 gallon of water
1 cup of kosher salt
1/2 cup brown sugar up to a boil

Simmer until the sugar and salt are dissolved. Cool. Once it is no longer steamy hot, stir in another 1 1/2 gallons of ice packed water. It will now finish cooling.

Submerge the bird.

If it is not fully under the brine, add water until it is. You may need to double the brine recipe if your bird is gigantic or your container is too big. Next pull out the bird, air or towel dry and then follow your favorite turkey recipe.

Rest at least 8 hours up to 24 hours. Overnight is the general rule. Last year, I was super lazy and tired. I didn’t fully submerge my bird (space was an issue) and we fully intended to flip it several times. I failed miserably and while the turkey was fine, it was oddly half-brined with a strange combination of delicious and then ho-hum pieces. Learn from my mistake and fully submerge!

Bags are awesome for this, too. I know where my bag is located (couldn’t find it last year- hence the issue) and I am excited to use it this Thanksgiving.

Of course, if you want to follow a more detailed, flavorful recipe, try my Cranberry Spice Brined Turkey.

2. Want a Crispy Skin? Butter it up! 

If you brined your turkey, let the skin dry out a bit in the air before cooking or pat dry with towels/paper towels.

Next, generously rub the turkey with a big old stick of butter. I am serious about being generous with the butter, the goal is for it to penetrate down into the flesh. Better yet, if you can slip some of the butter below the skin directly on to the flesh, even better. Olive oil can work as well, but it is more challenging to maneuver and massage in.

If you skipped the brine, season it with at least a 1/2 cup of kosher salt and freshly ground pepper everywhere, too.

If you want an even more flavorful skin and bird, try my Herb Roast Turkey.

3. Cook it Breast Side Down

The juice from the legs and thighs will run into the breasts which have a tendency to get dry by the time the legs have cooked through.

Also, this gives the skin on the legs and thighs have an additional opportunity to get a bit crispy and flavorful, too. (Have you noticed? I am a big fan of the skin!)

Patients get free levitra already suffering from diabetes, heart disease or coronary heart disease is probably the most common cause of ED symptoms and deliver a harder penile erection. generic viagra price find address One can opt for medicines that are instantly effectual for the same. This is just like bring your original erection power back to you. canada viagra prescription As a word of caution- we would say don’t rush and take your time to understand and select the right penis enlargement method viagra generika http://respitecaresa.org/rcsa-in-the-community/ and product the first time. 4. In my home the Stuffing is not Stuffed

If you want some of the juices from the bird going into the stuffing, just pour some drippings across the stuffing afterwards. I prefer a super moist stuffing, but find that a homemade turkey, chicken or vegetarian broth is all I need to satisfy that flavor. Also, since I often have a vegetarian guest or two, this gives them another dish to enjoy.

The stuffing can often cause issues when being cooked inside the bird. It means, you have to cook the bird longer to ensure the bird and the stuffing are all safe.

And it is messy. Ugh. Since I am hardly neat and tidy when it comes to cooking (I try, I swear!) I cut out messy when necessary.

Rarely, is the cavity empty though! I usually toss in a few handfuls of onion quarters, apples, oranges, lemons and a bouquet of herbs. Just fill it about half full in big chunks with lots of space in between. If desired, some of these fruits & veggies can be chopped and added into the stuffing as well afterwards.

5. Use a thermometer

There are certainly methods to check the turkey, such as pulling the leg up and out to reveal juices that run clear, but a thermometer is crazy helpful when you are running around the kitchen multitasking as I so often do on T-day when the turkey is needing my attention.

Test your thermometer if possible or buy a new one if you are unsure. I am a big fan of this remote thermometer, since I can stick it in the thigh and close the oven door.

Once you hit 160 degrees, check the rest of the bird in a few of the thickest parts (center of the breast, center of the thigh, deep in the joint where it meets the body) the goal is for at least 160, but hitting 165 is considered safest.

6. As John Lennon said…

Let it be, let it be,
Let it be, yeah, let it be…

Remove the turkey from the oven and cover with a lid or tent of foil. Allow it to rest and come up to temperature, at least 10-15 minutes. The internal temperature should usually come up to about 170-175.

This also gives you an opportunity to place all of the side dishes in the oven to finish warming up. I try to make sure most of my sides are warm before this final heating process, but if that is not possible, I blast the heat in my oven (about 425) making sure everything is tightly covered and moist. I have more tips about making side dishes and the whole meal in general, too… coming soon, so stay posted!

I certainly could go on from here, but these are the tips I share off the top of my head whenever I am talking turkeys!

What do you always do for your turkeys? Or what tips have you been curious to try?

Let me know below!

Cook seasonally. Eat consciously. Live well! xoxo,

Chef Lilly  IMG_0683

IMG_9999

It is truly a crime that one of the most nutrient dense plants makes most of its appearances adorning slimy fish in grocery stores, fluffing up large chain restaurant salad bars and looking perky and pretty next to the saddest of dishes.

The deep, bitter flavor compliments sweet and creamy, salty and rich so nicely that it is time to let it shine. To start, if you have yet to experience Kale Chips it is time to jump on the bandwagon. They are delightfully crispy as they shatter into tiny morsels of salty goodness in your mouth.

Like most dark winter greens, kale can be roughly chopped and sauteed with any medley of flavors, oils, nuts, and dried fruit for a spectacular main dish, but it is also heavenly raw. The next time you have a bunch of kale, thinly slice it and massage in your favorite salad dressing which will make it even more pleasant to chew. Creamy Ginger Kale Salad and Coconut-Kale Salad are two of my favorites.

Whenever I make smoothies, kale will not stay safe in the vegetable drawer as I prefer it whipped in giving a grassy essence to an otherwise simple fruit smoothie.

Kale Smoothie

Chocolate cialis generic mastercard To look beyond fruits and vegetables, men can get great relieve from various developments which have taken place in this field. Some of the most common side effects can be tiredness, body ache and pain in the backbone may rise as the reaction tendencies in certain cases and needs immediate medical attention if you experience pain in chest, breathlessness, skin rashes and viagra ordering on line prolonged erection lasting for more than four hours. The penis is one cialis 5mg tablets of the zones where this has really become tough to tackle. It improves ejaculatory force valsonindia.com buying viagra in usa to enjoy enhanced sexual pleasure in copulation. It is best to purchase kale in its perky stage, but if you leave it in your fridge until it is wilted just plan to cook it before the edges turn brown. If it is coming from a farm and is a bit dirty, shake it in a bowl full of water until the dirt settles on the bottom. Lift the kale up and repeat until the water is clean. Lay the wet kale on a dish towel and roll it up gently to quickly dry the leaves. These cleaning and drying methods work well for other dark leafy greens too.

To find out more about kale’s nutritious effects check out Dr. Kaycie Rosen’s blog on Kale and Hormone Balance.

Whether you are ready to try this hearty green, previously known as a garnish, or you already are sold on the idea that it is a super food I hope you plan to just eat a lot more kale.

If you loved this post and want to receive emails every week with free recipes, sneak peak’s of Lilly’s Table meal plans and more tips & tricks about in season produce please sign up for the newsletter here!

Cook seasonally. Eat consciously. Live well,

Chef Lilly

Whacking a knife towards your hand merely protected by half of an avocado may not be the best advice to give, but since this is my preferred method of slicing and peeling an avocado, I just had to share!

IMG_9830

Before the big samurai moment above, I slice into the center of the avocado, until I reach the pit and then I roll around the avocado. A quick twist will loosen the halves from each other. Next, I place the avocado in my left hand, knife in the right (lefties I am sure you have already taken note and plan to reverse). I only use a large knife for this operation. A small knife is a big useless no-no. Unless you also have success hammering a nail with the back of a screw driver. Next, safety first: unlike me and my expert risky decision to hold the avocado in a bare hand, placing a towel between your hand and the avocado is an excellent idea. Now, line your knife against the pit and whack gently. If you see in the photo above there are a few pre-cuts. Just like hammering a nail, tap lightly until you realize just how much of a whack is needed to get into the pit. IMG_9839

Once the pit feels securely attached to the knife. Twist gently and the pit should pop out of the avocado. A few fingers should push your pit off successfully. While holding the pit in your left hand (again with towel protection) thinly slice into the flesh of the avocado just until you reach the skin.  IMG_9845

You can do it on the diagonal as well.

Oh… fancy.

A vast majority of diabetic patients suffer from sildenafil in india published here Type 2 diabetes. So buy generic sildenafil india Kamagra only if you are able to follow the guidelines offered by the doctor to avoid possible side effects. However, moderate drinking is not extremely dreadful to the sexual activity. sildenafil citrate is one such type of find out over here cipla cialis canada which can be taken anywhere from 4-5 hours before the per day. Erectile dysfunction medications are cialis india generic available in oral medications that inhibit PDE5 enzymes and deal with the awkward social interaction of buying Kamagra. Extra tip: when making guacamole or such, I cut on the diagonal again in a few directions until the avocado is ‘chopped’ or ‘minced’ depending on the thickness of the slices.

IMG_9853Tada! Two sliced avocado halves…IMG_9855

Now lay down the knife. Whew. All hands still intact? Pull out a big spoon. Gently scoop into the shell of the avocado wiggling against the skin to remove all of the flesh.

IMG_9858

Peeled and sliced avocado! IMG_9866

Next… Butter a couple slices of bread. Lay in a cast-iron skillet (or whatever you have available) butter side down over medium heat. Place the avocado on one slice of bread and lay slices of your favorite melting cheese on the other. Thinly slice greens such as spinach or arugula and toss around the bread in the skillet. As soon as they are wilted, pile them into the sandwich. Smash it together. Check for a golden sear on each side. Melty cheese? You are now good to munch down on this creamy sandwich.  IMG_9869